System setups • AIX 3.x • AIX 4.x • AS/400 • CUPS • HP3000 • HP9000 • Legacy Mac • Linux • Mac OS X • Mainframe • Sun Solaris • Sun OS • Windows
The purpose of this document is to assist you in configuring your computer running Windows 7 or later to print through RPM Remote Print Manager® (RPM). This document is for network and systems administrators. For these instructions, you need to know the IP address or DNS hostname of the computer on which you install RPM.
If you are familiar with the term LPR printer, then RPM will be your LPR printer. You'll create a queue in RPM, which will serve as your printer port name.
Creating a Queue in RPM
- In the RPM user interface, go to Queue / Create
- Enter the name of the new queue you wish to add and click Create.
- Highlight the queue and choose Settings from the Queue menu. Then, add the action(s) necessary to produce your desired results. For instance, if you want to archive the file to disk, add Archive to disk. To print the documents, choose a Raw printer action.
- Now add any transforms you require. Unfortunately, Windows applications send complex print data, often limiting the number of useful transforms. As a result, using transforms such as converting to PDF or removing PCL codes may not produce desirable results.
Note: These instructions provide only a brief introduction to RPM configuration. For more detailed instructions, refer to the RPM manual.
Creating a Windows LPR Printer
- Open the Windows Devices & Printers utility. Click the Add a Printer link. Windows may search for and display a list of printers from which to choose. Click The printer that I want isn't listed.
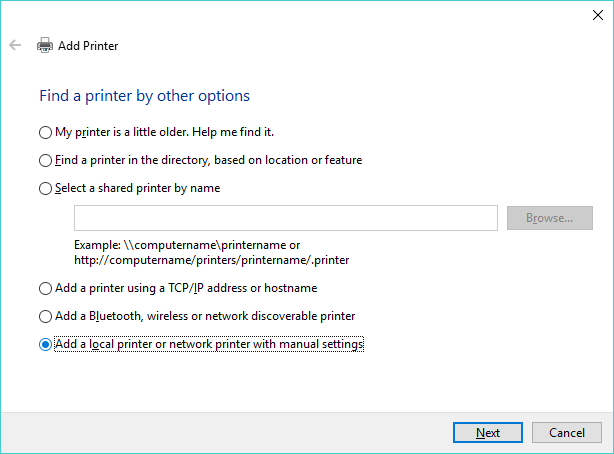
- You may then be prompted to find a printer by other options. Select Add a local printer or network printer with manual settings and click Next.
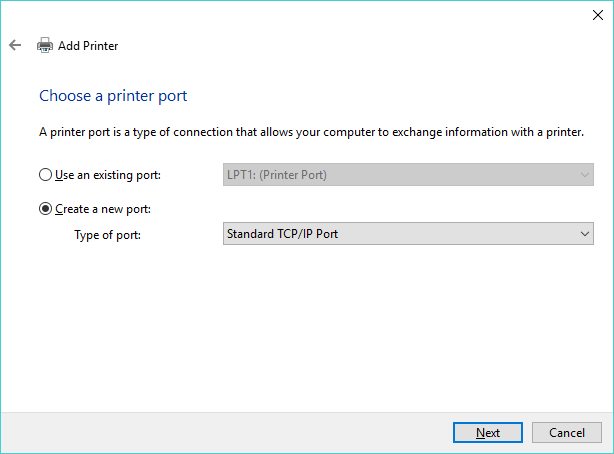
- Select Create a new port and Standard TCP/IP Port from the types of ports listed. Click Next.
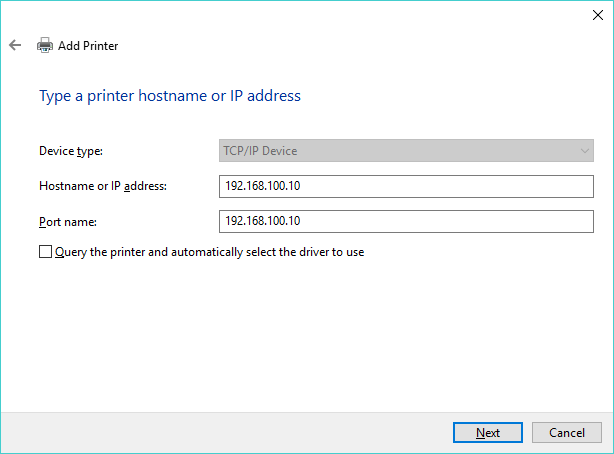
- Enter the hostname or IP address of the RPM host in the Hostname or IP Address field. You may either accept the default port name or enter another name. You might also deselect Query the printer and automatically select the driver to use and click Next.
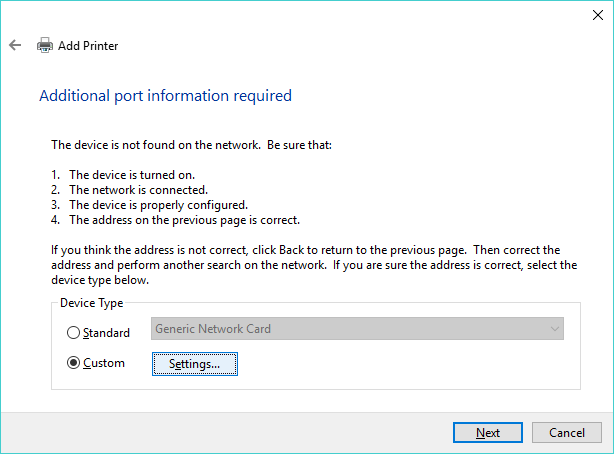
- Windows attempts to detect the TCP/IP port, but will eventually time out and request additional port information. Choose Custom and click Settings.
- Select the LPR protocol, and enter the RPM queue name in the Queue Name field. LPR byte counting enabled should be selected. Note: do not select SNMP Status Enabled. Click OK when finished. Click Next.
- Follow the remainder of the Add Printer wizard selecting the correct printer driver and other optional desired settings.
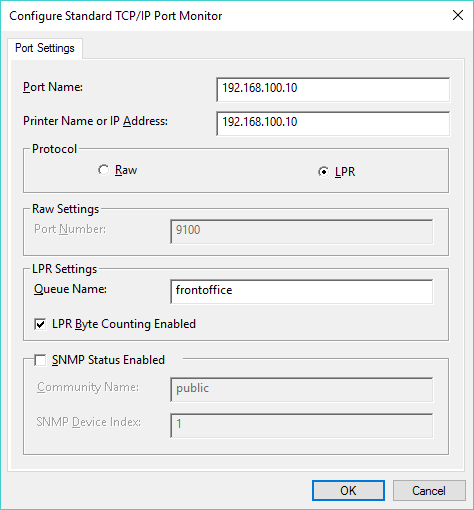
Please note: as of RPM version 6.2 you no longer need to select "LPR Byte Counting Enabled." However, it doesn't hurt anything to keep this selected.
Alternative: print raw to RPM
You probably noticed that the dialog has a "Raw" option as well as LPR. You can use that with RPM as well.
It is easy to set up RPM to listen for raw print jobs on port 9100 or any other port. However, you will need to do a little bit of setup as RPM does not have port 9100 enabled by default (in case you have other software listening on that port).
Please see the Direct socket setup page for instructions.