The purpose of this document is to assist you in configuring SCO UNIX to print through RPM. It is intended for those familiar with SCO UNIX administration and LPR/LPD printing. For these instructions, you need to know the IP address or DNS hostname of the computer on which RPM is installed.
Creating a Queue in RPM
- In RPM, choose Create from the Queue menu.
- Enter the name of the new queue you wish to add and click Create. The new queue will be created.
- Highlight the queue and choose Settings from the Queue menu. Add the action(s) necessary to produce your desired results. For instance, if you want to archive the file to disk, add Archive to disk. If you want to print the documents, choose a Text or Raw printer action.
- Now add any transforms you require. If the data is plain text, a Text markup transform may be used. Once in text markup, it can be converted to PDF or HTML, or printed to a Text printer action. If the incoming data is PCL, you need to first remove the PCL codes. Postscript format can use a Raw printer action, but no transforms.
Note: These instructions are intended to provide only a brief introduction to RPM configuration. For more detailed instructions, refer to the RPM manual.
Adding an SCO UNIX Printer
- We recommend you perform a telnet test to verify your UNIX server can connect to RPM. To do so, type the following at a UNIX command prompt: telnet <address> 515. Substitute the IP address or hostname of your RPM host where appropriate.
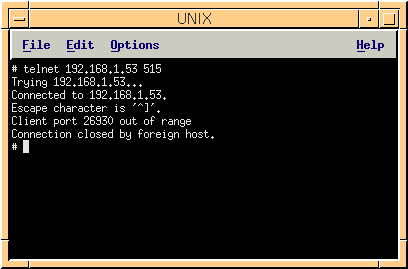
- A successful connection shows a "connected to <address>," message indicating connectivity. After pressing Enter, the connection will close and show a "unknown LPD command" message. If the RPM log has this same message, your telnet test was successful.
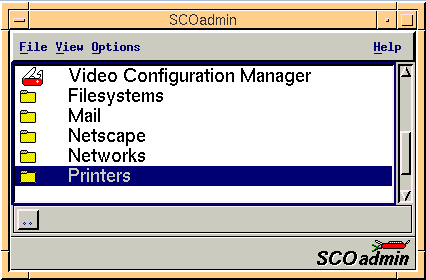
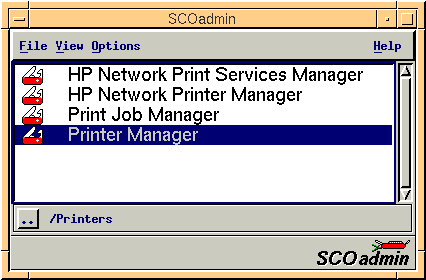
- Run scoadmin and select Printers. Then select Printer Manager.
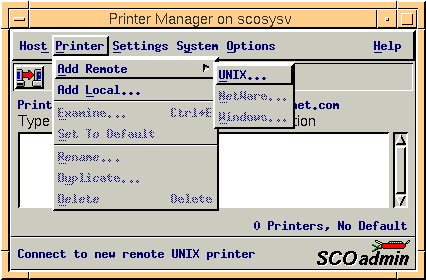
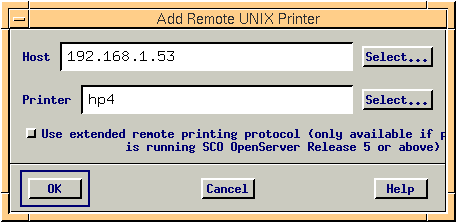
- From the Printers menu, point to Add Remote and choose UNIX. If remote printing is not configured, scoadmin will ask you to configure remote printing. Press OK.
- Add the IP address of the computer running RPM and the RPM queue name. Remember to substitute your IP address or hostname. Deselect Use extended remote printing protocol. If you forget, you can later modify the /etc/printcap file and remove the ':ex' from the printer definition. Leave a single colon separator.
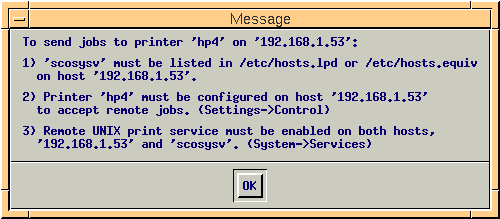
- Scoadmin will now prompt you with steps to perform on both the SCO server and the RPM host. Nothing needs to be done at this time on the RPM host computer.
- To test this printer, you can run the following command from a UNIX command line: cat /etc/printcap | lp -d hp4.
You have now successfully configured SCO UNIX to print through RPM.