It seems like at any given time, we have at least one customer exploring the question with us, “How do I print my jobs from multiple bins or output to multiple trays?”
There is no one term for the process. It’s likely to be any of the following:
- Triplicate printing, or “How do I print my forms in triplicate” (of course, any number works here)
- Multiple-tray printing, or multi-tray printing
- Printing on multiple printers at once
- Or even “How do I print on different colors of paper?”
This article assumes we are using the Elite version of our RPM Remote Print Manager(R) (RPM) product. Let’s say we want to print three copies of this print job. There are several questions we can ask, depending on how many printers we have for this task.
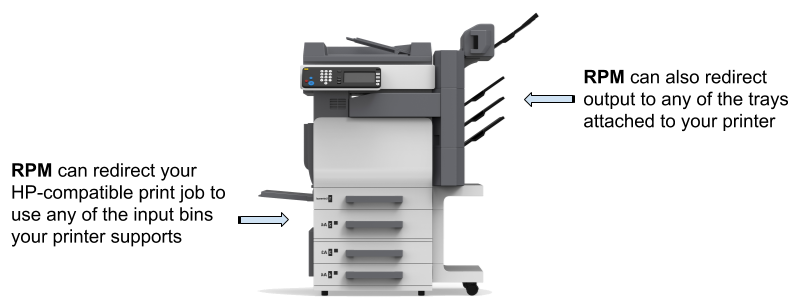
- Is this all going to one printer and several trays? We have a video that describes that process. We also have a page that explains it from a slightly different angle
- Do you have three printers? If so, are they identical? If the only difference is in the stock you load the printer with, then the answer is simple, and we’ll talk about that first.
- If we have three printers but need to change the input tray for each print job, we’ll talk about that last.
I should mention that if you are using multiple trays in the same printer, you owe it to yourself to go to one of the links above. The biggest disappointment from users at first is that they can’t control the order in which the jobs print. That matters if the jobs stack up in one bin. If you follow the instructions we provide, then you can do just that.
Again: the video link and article
How to send the same job to three printers without changing the tray
Sometimes life is just that easy :-)
If that’s the case for you, let’s breeze through this setup to score a win and move on to the next challenge in your day.
Send your jobs to three printers
First, we’ll set up a queue. You would have your remote print client send the jobs to this queue.
Go to Queue -> Create, then enter a name in the Queue Name field. Deselect the setting "Suspended" under "Initial State." Select the setting “Open Configuration Dialog after creation.”
In the queue, we’ll set up three actions. The action setup panel is in the bottom half of the Configure Queue dialog. Use the list “Select Action Type to Add …” then select “Raw Printer” from the list.
Now click the Add Action button. You can refer to the “Raw Print action” page for an explanation of the credentials and other settings on this form. For now, select your printer from the “Printer Selection” list and click “OK.”
Repeat this step with each of your printers, and finally, click OK on the Configure Queue form.
Send your jobs to specific trays in three printers
The example above assumes that the print job already arrived preformatted for the three printers you had available and that they were identical (enough) to work for you without a single issue. Next, I’d like to show you how to set up RPM to print to a specific tray on three different printers. The number doesn’t matter; you can use this same setup for two printers, four, or however many you want.
Our approach: divide and conquer
The print jobs for these three printers will need special consideration since we know we have to change the tray selection. Therefore, we can’t put all three in one queue as we did before. Whatever happens to one job in a queue happens to all jobs in a queue. That’s one of the metrics for deciding which jobs go to a queue: they are all treated the same way.
Here are the steps to set this up.
- We’ll set up one queue to receive the print job, which will forward the job to each of the three queues we will create in the next step.
- Create three new queues, one for each printer.
- In each of the three queues, we’ll include a raw print action pointing to one specific printer, similar to what we did above with the three raw print actions (only we’ll target just the one printer)
- Also, in each queue, we’ll add a PCL Resource Mapping transform. We’ll talk more about that in a moment.
Question: what tray do I use?
Fortunately, we have a new video that demonstrates how to use Print Test Page with your Windows print definition, selecting each tray you want to use and at the same time, using RPM to log the tray ID. This ID is what you need. Check out the video
Now that you've chosen a printer tray, we're ready to have RPM direct your print job to that tray. In the queue list, go to the first of your three queues which target a specific printer. Double-click on the queue name. In the Configure Queue form, click the drop list "Select Transform Type to Add." The first section is labeled "Translations" and "PCL Resource Mapping" is listed partway down. Please select that.
Next, click the "Add Transform" button. The PCL Resource Mapping form is pretty simple for general use, although you can be very specific with the results you get. For instance, you can map any tray to one particular tray; or you can map just one tray to any other tray. You accomplish this mapping with the two drop lists at the top of the form.
Let's say for the sake of argument that the only tray you want to use with this printer in this queue is tray 1. Here's how:
- For "Map Input Tray" make sure "*" is selected. That matches all trays
- For "To Input Tray" make sure "1" is selected
- Click Add, and you've added that rule
Click "OK" to complete this setup.
You should now go to configuration for your other two queues, the ones targeting the other printers, and repeat the steps above. You already have the raw print action, so add the PCL resource mapping you need to make it work, and you are finished.
The Forwarding Queue
Let’s go back to our original queue for a moment. This would be the queue we send the jobs to, which then forwards the print jobs to our three printer-specific queues.
The way we do this is with the “Copy Queue” action. This action takes a job and submits it to another queue as if you had printed the job to that queue. We have found several uses for this action; here, we are using it to multicast to the other three queues.
The alternative is configuring your upstream process to print to all three queues. Most of the time, that’s not practical.
This is how we set that up:
- We will configure the queue we send all the print jobs to. Double-click on that queue in the queues list.
- In the Configure Queue form, click “Select Action Type to Add”. Select “Copy to Queue”. In my copy of the interface, it’s at the bottom of the list.
- Now click the “Add Action” button. In the Copy to Queue form, the setting “Specific Queue” is selected by default. Select the list under that; at first, nothing is displayed. Select the first queue that targets one of your printers. Then click “Add Queue”. You are finished, so click the OK button.
- Repeat this process for the other queues which target one of your printers.
Now, whenever you send a print job to this queue in RPM, it will forward a copy of that print job to the three queues that target your specific printers by adjusting the input tray as you configured it to, then printing to that printer.
Conclusion
We didn’t plan RPM with this specific job in mind, but the mix of capabilities in RPM came together to make it pretty straightforward. More importantly, you can tailor how RPM works to meet your specific goals.
If need be, you can always contract for custom development to target a situation RPM cannot do out of the box.